I am so excited to be joining the One Room Challenge Spring 2022. "The One Room Challenge® is a biannual event every spring and fall. Everyone with a blog or Instagram account is welcome to join the fun as a Guest Participant by registering for the event with the room or space you plan to transform."
Be sure to check out the other participant rooms here: www.oneroomchallenge.com/orc-blog. This is such a great community and I am so honored to be joining so many talented individuals as we endeavor to complete our rooms in the 8 week timeline.
Each week I will give an update either on my blog or on my instagram page @crysleedesign so follow along for the journey!
Week 2 =Prep Work
I had a lot prep work to make this space a room ready to be finished.
Drywall Mud/Taping
We hired out the drywall mud and taping for our entire basement. The drywallers even did the tile backer to the shower, which was so nice.

Leveling the Concrete Floor
Now that drywall was was complete it was time to move on to leveling the concrete in the bathroom in prep for the tile. I am planning to use a larger format tile so it is better to be safe than sorry with starting with a very level floor.
Using self leveling concrete was the most nerve wracking part of this renovation for me. I had never used concrete before or self leveler. I had never used a paddle on a drill to mix something together let alone concrete pour and smooth concrete. So I was very nervous. But I watched lots of tutorials. Honey Built Home has a great tutorial.
I also had my sister-in-law come help and watch tutorials so we both had a decent idea of what to do before we got going. It is definitely a 2-person job.
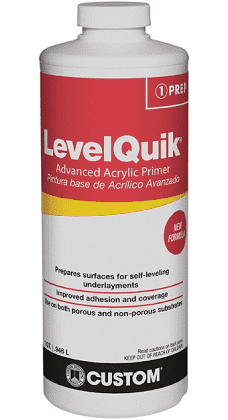
I used Level Quick- Self Leveling Underlayment concrete.
First Clean: I swept, vacuumed, and mopped the concrete to get rid of the dust and any mud that fell on the floor.
Next Prime: I used a 9-inch paint roller to spread the primer over the concrete in the bathroom. I poured from the bottle and then rolled it around. This was a pretty quick process. The primer needs to dry for at least 2 hours, but no more than 24 hours. I did it at night and it was pretty dark in the bathroom so I didn't end up getting a great picture.
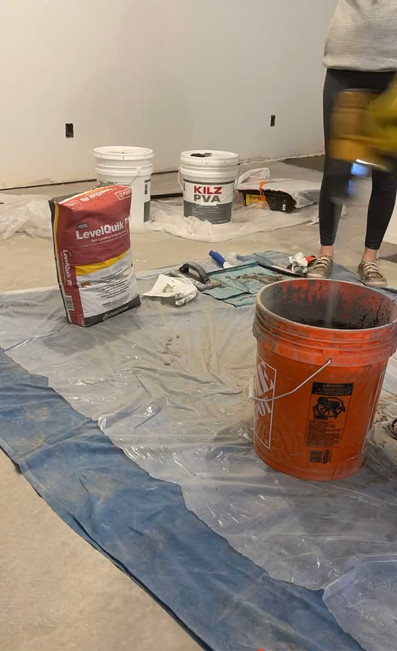
Mix: I had 3 buckets ready and pre-measured water out into each bucket so we could mix together the next bags quickly after we had poured the previous bag. I used my Dwalt Cordless drill and a paddle to mix while my sister in law slowly poured in the concrete powder. The instructions say to mix for approximately 2 minutes until there are no more chunks. I also read a very helpful tip to keep the paddle low into the bucket and to not mix up and down until the very end and that worked well. We kept a steady pace with the drill. If we went up and down in speed too much it wore out the battery crazy fast. Slow and steady and we were able to use one battery for 3 bags.
Pour and Spread:
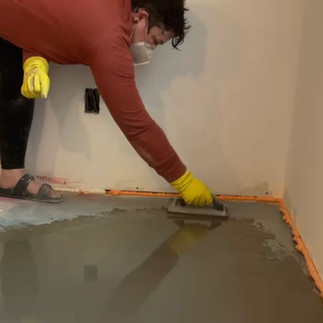
After mixing we quickly poured the concrete onto the floor pouring in the center of the lowest point first. Then used a squeegee and grout float to help spread the concrete. You need to move quickly because the concrete firms up quickly. We poured at the edges once the next batch was ready. We feathered at the edges to make it blend with the existing concrete. If the consistency starts to feel like grout it is time to stop touching it because it will stop self leveling. We ended up using 3.5 bags on the bathroom floor.
Cure: The final step is to let the concrete cure. The floor takes 4 hours to harden and apparently is ready for some flooring at that point and then 24 hours for all other flooring. The floor isn't perfectly smooth in the areas where we feathered, but pretty close. Most importantly it is level!

I feel like my DIY skills majorly leveled up learning how to do this project. I am very excited for the next step for the floor of laying the tile!
Painting the Walls
I wanted to paint before putting in the tile so there was less need to tape anything off. The plan is to add a wall treatment - looking at Roman Clay or peel and stick wall paper, but you can't add peel and stick wall paper without painting bare drywall so I painted all the walls as well as the ceiling. Before I could paint there was a lot of cleaning involved.
All the walls had lots of dust that needed to be wiped down before they could be primed and then painted. I used a drywall primer and then used Pure White by Sherwin Williams for the walls and ceilings. It matches the rest of the house so we are sticking with that.

The first step in painting is to "cut-in". This means painting all the corners and edges the same color. Then you can use a roller to cover the rest. I ended up only painting the ceiling and put pause on the walls because I think I might actually pivot and do the Roman Clay instead. I am just waiting to see what is possible with the texture I have on my walls.
So here is where I am at the end of week 2! Click through to remember where we started.














Comments