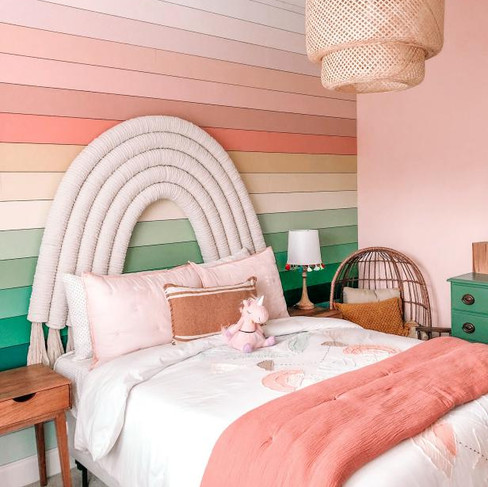
I built a rainbow shiplap wall for my daughter’s room. I wanted her to walk into the room and feel joy every time she saw the wall. Check out how I made it happen.
If you would like to view the design side of this project, visit this post.
Here is where this room started. I knew I wanted to do something in her room to make this space stand out and feel more like her. I knew I wanted to do a shiplap wall and was deciding on color. I like more earthy tones, but my daughter would not appreciate a sage-green wall like I do. My daughter loves rainbows and sparkles. So I came up with an idea to do a rainbow shiplap room.

I immediately went searching for inspiration and to see what other's had done. I found a few bloggers @Jessiegirlhome and At Home with Ashley.
From there I decided to use the same shiplap as the bathroom backsplash. I decided to
order the 8ft boards instead of 16ft because I read that the long shiplap boards were often warped because of the length. In hindsight, I should have dealt with the warping because the piecing together the 8ft boards for the 10 ft wall did not turn out great.
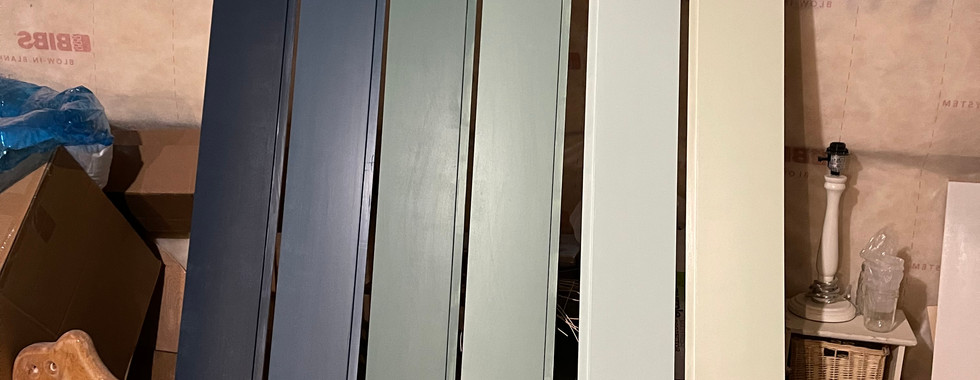
I went to Home Depot and started with over 30 paint chip paper things, narrowed it down to the colors I liked and then bought samples of each one.

I ended up needing to mix a few colors to get just the right tone. Then I pre-painted all the shiplap using a foam roller.
I measured and laid everything out and to avoid getting a really small piece at the bottom, I ripped (cut) the first board and the bottom board a tiny bit to make sure everything would look even throughout. I use this technique for tile as well.
I marked the studs along the wall and then started at the top. I alternated which side was short so that I didn't have a full line of gaps. In hindsight I should have varied the lengths instead so you couldn't fallow the line down. I also should have done these joints as miter joints for a cleaner fit. It turned out all right, but it could have been better.

Special note about the joints:
I filled in each place I had patched the boards together with wood filler. I sanded it down, filled it again then sanded again to get the smoothest finish possible. I did not use any wood glue so despite angling the nails with the brad nailer there was movement at the joints when I sanded so it was difficult to get a fully smooth joint. Then there was shifting over the past few years - it is an exterior wall. So I would recommend using liquid nails if you do have joints and want those joints to disappear from your shiplap.

I did a small cut out around the outlet at the bottom. I was grateful there was only one outlet on this wall. I filled in all the gaps between the wall and ceiling with caulk. I also reattached the baseboard, which I took off before I attached the last board to make the wall look built-in.
After I finished sanding, I primed over all the patches. Using primer avoids flashing (variation in sheen) that may occur if you don't primer over wood filler or caulk.

Next step was painting over all the nail holes and joints.
Here is where I left off with this project for a few years.

Visit this post to see how I styled the room.
Tools Used for This Project:
Tools are sometimes the most expensive part of a project, but now that I have these I don't need to buy them again for future projects.
I can help you create the vision for your space and give you a virtual blueprint to refer to as you have money or budget to bring it to life. I can help you plan out the necessary DIY and give you the confidence you need to carry it out. I will make sure that the items selected are within a price range and budget you are comfortable with. DIY or Interior Design don't need to feel intimidating or be out of your reach financially. Shoot me an email and we can set up a time to chat and walk through the process.


ความคิดเห็น